
Last Updated on November 17, 2025 by Fredrick Miller
Yes, you can absolutely sublimate on vinyl and when done correctly, it opens up incredible creative possibilities for your crafting projects. Sublimation on vinyl allows you to create vibrant, durable designs on dark fabrics, cotton materials, and surfaces where traditional sublimation won’t work
However, success depends entirely on using the right type of vinyl, proper temperature settings, and correct application techniques. Standard PVC vinyl won’t work because it melts at sublimation temperatures. You need specialized polymer-coated vinyl designed to withstand heat while accepting sublimation ink.
In this comprehensive guide, I’ll walk you through everything you need to know about sublimating on vinyl from choosing the right materials to troubleshooting common problems so you can achieve professional results every time.
Before diving into vinyl sublimation, it’s essential to understand the basics. If you’re new to this craft, learn how to use sublimation printers to get started.
Table of Contents
Understanding Sublimation on Vinyl: The Basics
Sublimation printing works by converting solid ink into gas using heat and pressure, which then bonds with polyester fibers at a molecular level.. Traditional sublimation only works on polyester or polymer-coated surfaces, which is why regular cotton fabrics don’t work.
This is where vinyl becomes a game-changer. By using vinyl as either a base layer or as the primary substrate, you can sublimate designs onto materials that would otherwise be incompatible with sublimation.
Why Use Vinyl for Sublimation?
The combination of sublimation and vinyl solves several critical limitations:
Expand Material Compatibility: Apply sublimation designs to cotton, cotton blends, dark-colored fabrics, and materials that can’t be directly sublimated.
Enhanced Color Vibrancy: Using white or clear vinyl as a base layer provides the bright background needed for vibrant sublimation colors on dark surfaces.
Cost-Effective Alternative: Permanent vinyl is often more affordable than specialized sublimation blanks while offering similar or better durability.
Waterproof Results: Unlike printable vinyl or sticker paper, sublimated vinyl creates completely waterproof designs that won’t fade or peel.
Versatility: Create custom stickers, decals, patches, and designs for both fabric and hard surfaces.
Types of Vinyl You Can Sublimate On
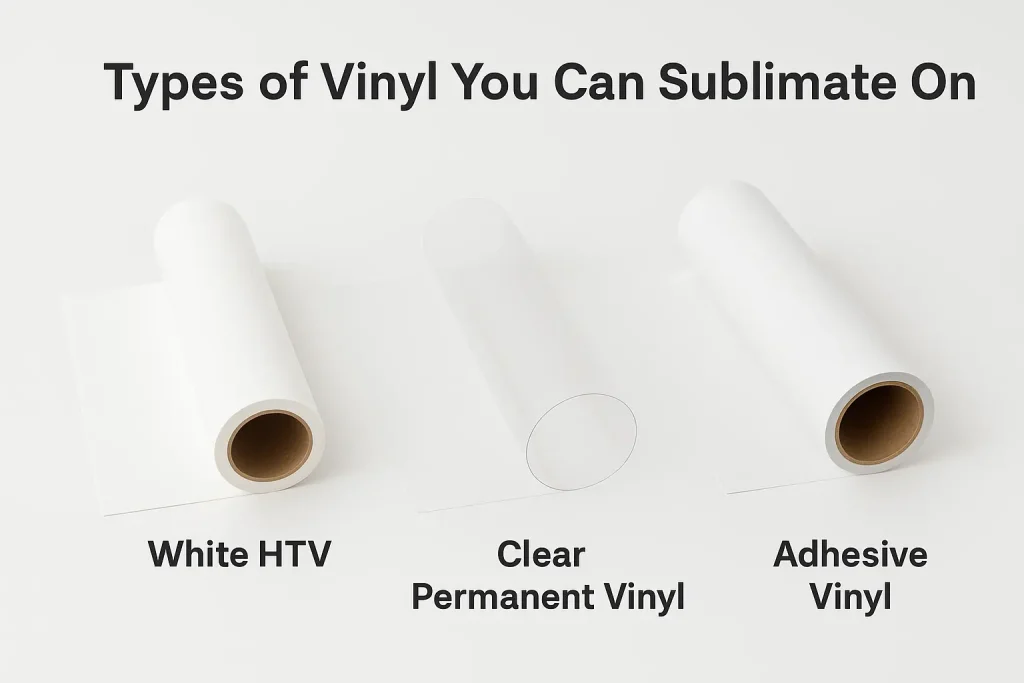
Not all vinyl is created equal when it comes to sublimation. The vinyl must have specific characteristics to withstand sublimation temperatures without melting while accepting the sublimation ink transfer.
Heat Transfer Vinyl (HTV) for Sublimation
Heat transfer vinyl specifically designed for sublimation is the most reliable option. These specialized HTVs contain polymer coatings that bond with sublimation ink.
White Sublimation HTV: This is the gold standard for sublimating on dark fabrics. The white background provides the necessary base for vibrant colors. Brands like Siser EasySubli and HTVRONT Sublimation HTV are specifically engineered for sublimation with excellent results.
Clear Sublimation HTV: Perfect when you want a translucent effect or need to layer over existing designs. Clear HTV works best on white or light-colored backgrounds to maintain color vibrancy.
Specialty Sublimation HTV: Some glitter, holographic, and glow-in-the-dark vinyls contain polymer coatings that accept sublimation ink. These create unique textured effects while maintaining the sublimation image quality.
Adhesive Vinyl for Sublimation
Permanent adhesive vinyl can be sublimated for creating stickers, decals, and decorative applications.
Clear Permanent Vinyl: Popular brands like Oracal 651 clear vinyl work exceptionally well for sublimation.. The key is using permanent (not removable) vinyl that can withstand temperatures up to 350-400°F.
White Permanent Vinyl: Provides the opaque background needed for vibrant colors on dark or transparent surfaces.
Important Note: The vinyl MUST be permanent adhesive vinyl. Removable vinyl cannot withstand sublimation temperatures and will fail during the heat press process.
What Vinyl Types DON’T Work for Sublimation?
Understanding which vinyls to avoid saves time and material waste:
- Standard PVC Vinyl: Most common craft vinyl melts at sublimation temperatures (typically only rated to 200-250°F).
- Removable Adhesive Vinyl: Cannot withstand heat and pressure.
- Regular HTV Without Polymer Coating: Standard heat transfer vinyl lacks the coating necessary to bond with sublimation ink.
- Cheap or Unknown Brand Vinyl: Quality matters off-brand vinyl often has inconsistent temperature tolerance.
Step-by-Step: How to Sublimate on Vinyl
Method 1: Sublimating on Clear or White Adhesive Vinyl
This method is ideal for creating waterproof stickers and decals.
Step 1: Prepare Your Design
- Mirror (flip) your design horizontally before printing this is crucial
- Print on sublimation paper using sublimation ink
- Size your design appropriately for your project
Step 2: Cut Your Vinyl
- Cut clear or white permanent vinyl slightly larger than your design (add 0.25″ border)
- You can cut precisely using a cutting machine or simple shapes with scissors
- No weeding is necessary for this method
Step 3: Tape the Design
- Place sublimation print face-down on the vinyl surface
- Use heat-resistant tape to secure all edges shifting ruins the transfer
- Ensure complete contact between paper and vinyl
Step 4: Heat Press Application
- Preheat your heat press to 350°F (175°C)
- Place parchment paper above and below the vinyl sandwich
- Press for 25-30 seconds with medium to firm pressure
- Temperature tolerance: 340-365°F depending on vinyl brand
Step 5: Cool and Remove
- Allow vinyl to cool completely before removing the paper this is essential
- If paper residue sticks to vinyl, lightly mist with water and wipe with a paper towel
- The paper will dissolve and rub away easily
Step 6: Application
- Apply your sublimated vinyl decal to your desired surface
- Works beautifully on tumblers, mugs, phone cases, and hard surfaces
Method 2: Sublimating on White HTV for Dark Fabrics
This technique allows you to apply full-color sublimation designs to dark and cotton garments.
Step 1: Pre-Press Your Garment
- Press your garment for 5-10 seconds to remove moisture and wrinkles
- Moisture is a common cause of faded sublimation results
- Let the garment cool completely before proceeding
Step 2: Prepare Your Sublimation Print
- Print your design mirrored on sublimation paper
- Ensure your design size matches your cut vinyl dimensions
- Trim excess paper around the design
Step 3: Cut White Sublimation HTV
- Cut your white sublimation HTV to match your design shape
- Add a 0.1″ offset around your design for perfect coverage
- Weed away excess vinyl if necessary
Step 4: Sublimate onto the HTV
- Place HTV adhesive-side UP (glitter or white side DOWN)
- Position sublimation print face-down on the HTV
- Tape edges with heat-resistant tape
- Press at 320-350°F for 30-45 seconds with firm pressure
Step 5: Cool and Check
- Let it cool completely before removing the paper
- Check that the design transferred clearly
- Use water to remove any stuck paper residue
Step 6: Apply to Garment
- Position the sublimated HTV on your garment (design facing up)
- Cover with parchment paper or Teflon sheet
- Press at 300-320°F for 10-15 seconds with medium pressure
- Peel carrier sheet when cool (cold peel recommended)
For more techniques on dark fabric sublimation, read our complete guide on how to sublimate white on black shirts.
New to shirt sublimation? Start with our comprehensive tutorial on how to sublimate a shirt.
Method 3: Using Clear HTV with White Base Layer
This advanced technique creates the most professional results on dark fabrics.
Step 1: Apply White HTV Base
- Cut regular white HTV to your design shape
- Apply to garment first at manufacturer’s recommended settings
- This creates the opaque background needed for color vibrancy
Step 2: Sublimate on Clear HTV
- Follow Method 2 steps to sublimate your design onto clear sublimation HTV
- The clear vinyl will show the full-color design
Step 3: Layer and Apply
- Position the sublimated clear HTV directly over the white HTV base
- Press at 300-310°F for 10-15 seconds
- Creates a layered effect with exceptional color brightness
Essential Equipment and Materials
Required Equipment
Sublimation Printer: You need a printer capable of using sublimation ink. Options include:
- True sublimation printers (Epson SureColor F170, Sawgrass SG500)
- Converted inkjet printers with sublimation ink (Epson EcoTank models)
- Cannot use regular inkjet or laser printers
If you’re just starting out, check our guide on the best sublimation printer for beginners.
Epson printers are highly recommended for vinyl sublimation. See our comprehensive review of the best Epson sublimation printers.
For larger projects, consider investing in 13×19 sublimation printers that handle wide-format vinyl.
Need to sublimate on large vinyl sheets? Our guide to the best wide format sublimation printers has you covered.
Planning to sell sublimated vinyl products? Read our analysis of the best sublimation printer for small business.
The Epson WorkForce WF-7710 is excellent for vinyl sublimation. Read our full Epson WorkForce WF-7710 review for detailed specifications.
Heat Press Machine: A quality heat press is essential for consistent results:
- Clamshell or swing-away press recommended
- Temperature range: 300-400°F required
- Even pressure distribution crucial
- Size appropriate for your projects
Alternative: An iron can work in emergencies, but results will be inconsistent and unprofessional.
While a heat press is strongly recommended, learn whether can you use an iron for sublimation in our detailed guide.
Cutting Machine (Optional): For precise shapes and professional edges:
- Cricut machines (Maker, Explore, Joy)
- Silhouette Cameo
- Manual cutting with scissors works for simple shapes
Required Materials
Sublimation Paper:
- 8.5″ x 11″ or larger depending on design size
- 125 GSM weight recommended (A-SUB is budget-friendly and effective)
- Must be specifically designed for sublimation
Sublimation Ink:
- Must be sublimation-specific ink (not regular inkjet ink)
- Hiipoo and Printers Jack are reliable brands
- Colors: cyan, magenta, yellow, black (CMYK)
Heat-Resistant Tape:
- Secures paper to vinyl during pressing
- Prevents shifting that ruins transfers
- Regular tape will melt
Protective Paper:
- Parchment paper or butcher paper
- Protects heat press platens from ink transfer
- Teflon sheets work but may affect pressure distribution
Vinyl Materials:
- Clear or white permanent adhesive vinyl (Oracal 651, Cricut)
- White sublimation HTV (Siser EasySubli, HTVRONT)
- Specialty sublimation HTV as desired
Critical Heat Press Settings for Vinyl Sublimation
Temperature and pressure settings are the most critical factors for successful vinyl sublimation. Incorrect settings cause 90% of common problems.
Temperature Settings by Vinyl Type
Adhesive Vinyl (Clear/White Permanent):
- Temperature: 350-365°F (175-185°C)
- Time: 25-30 seconds
- Pressure: Medium to Firm
White Sublimation HTV:
- Temperature: 320-350°F (160-175°C)
- Time: 30-45 seconds
- Pressure: Firm
Clear Sublimation HTV:
- Temperature: 320-350°F (160-175°C)
- Time: 30-45 seconds
- Pressure: Firm
Specialty HTV (Glitter, Holographic):
- Temperature: 320-340°F (160-170°C)
- Time: 20-30 seconds
- Pressure: Medium (too much pressure flattens texture)
Applying HTV to Fabric:
- Temperature: 300-320°F (150-160°C)
- Time: 10-15 seconds
- Pressure: Medium
Pressure Guidelines
Understanding pressure is as important as temperature:
Light Pressure: Barely makes an impression, ineffective for sublimation
Medium Pressure: Slight resistance when closing press, suitable for specialty vinyls and final HTV application
Firm Pressure: Strong resistance when closing, required for proper sublimation ink transfer onto vinyl base
Too Much Pressure: Damages vinyl texture, causes excessive paper sticking, may create uneven transfers
Pro Tip: Always do a test press with your specific materials. Vinyl brands vary in heat tolerance, and your heat press calibration affects results.
Troubleshooting Common Vinyl Sublimation Problems
Even experienced crafters encounter issues. Here’s how to identify and fix the most common problems.
Problem 1: Faded or Washed-Out Colors
Causes:
- Insufficient temperature or time
- Too much moisture in substrate
- Low-quality or clogged sublimation ink
- Pressure too light for proper transfer
Solutions:
- Increase temperature by 10-15°F and/or add 5-10 seconds
- Pre-press substrate to remove all moisture—press for 10 seconds, let cool completely
- Clean printer heads or replace ink cartridges
- Apply firmer pressure during sublimation transfer
- Check that vinyl is rated for sublimation temperatures
Prevention: Always pre-press to remove moisture, perform printer maintenance regularly, and test settings on scrap material first.
Problem 2: Vinyl Melting or Distorting
Causes:
- Temperature too high for vinyl type
- Pressing time too long
- Using non-sublimation-compatible vinyl
Solutions:
- Reduce temperature by 20-30°F
- Decrease press time by 10-15 seconds
- Verify you’re using sublimation-rated vinyl
- Switch to higher-quality vinyl with better heat tolerance
Prevention: Always check manufacturer specifications for maximum temperature. When trying new vinyl brands, start with lower temperature and gradually increase until you get good results.
Problem 3: Sublimation Paper Sticking to Vinyl
Causes:
- Vinyl temperature too high causing paper to bake on
- Insufficient cooling time before removing paper
- Paper quality issues
- Pressure too firm
Solutions:
- Let vinyl cool completely be patient, this takes 2-3 minutes
- Mist stuck areas with water and gently rub with paper towel paper will dissolve
- Use fingernail or plastic scraper to gently remove stubborn bits
- Lower temperature by 10-15°F for next attempt
- Reduce pressure slightly
Prevention: Never rush the cooling process. The paper naturally releases when completely cool. Using quality sublimation paper reduces sticking issues.
Problem 4: Color Bleeding or Blurry Edges
Causes:
- Design or vinyl shifted during pressing
- Too much moisture present
- Pressing time too long
- Pressure inconsistent
Solutions:
- Use more heat-resistant tape to secure all edges firmly
- Pre-press to remove all moisture
- Reduce time by 5-10 seconds
- Check heat press for even platen contact
Prevention: Tape all four sides and check that everything is flat and secure before pressing. Replace worn heat press pads that create uneven pressure.
Problem 5: Browning or Burning
Causes:
- Temperature excessively high
- Time too long
- Insufficient protective layers
Solutions:
- Reduce temperature by 20-30°F immediately
- Decrease time by 10-15 seconds
- Always use parchment paper or Teflon sheet as protective barrier
- Check heat press calibration it may be reading incorrectly
Prevention: Never exceed manufacturer’s maximum temperature rating. Use a heat press with accurate temperature control and consider using an infrared thermometer to verify actual platen temperature.
Problem 6: HTV Not Adhering to Fabric
Causes:
- Incorrect temperature for fabric application
- Insufficient pressure or time
- Fabric not compatible (silicone-coated, water-resistant)
- Vinyl applied with wrong side down
Solutions:
- Increase temperature to 300-320°F for HTV application
- Apply firmer pressure and press for full 10-15 seconds
- Test on similar fabric some performance fabrics repel adhesive
- Verify vinyl adhesive side is against fabric (carrier sheet on top)
Prevention: Always pre-press garment, ensure correct vinyl orientation, and use appropriate settings for the HTV application step (different from sublimation settings).
Advanced Techniques for Professional Results
Creating Multi-Layer Designs
Combining different vinyl types creates dimension and visual interest:
- Base layer: Apply white HTV to dark fabric
- Second layer: Sublimate design on clear HTV, apply over white base
- Accent layer: Add cut vinyl details in contrasting colors
Tip: Let each layer cool completely before applying the next. Use lower temperature (300-310°F) and shorter time (8-10 seconds) for subsequent layers to avoid overheating.
Using Offset for Precise Alignment
When sublimating onto cut vinyl shapes:
- In your design software, create your sublimation image first
- Use the offset function to create a border 0.1-0.15″ around the design
- Cut vinyl using the offset outline
- Sublimation print stays within vinyl boundaries perfectly
This technique ensures no sublimation ink bleeds onto your garment outside the vinyl area.
Sublimating Before Cutting
For extremely precise edges:
- Sublimate your design onto a full sheet of vinyl first
- Let cool completely
- Cut the sublimated vinyl to your desired shape
- Apply to final project
This method provides the cleanest edges but uses more vinyl material.
Color Correction for Optimal Results
Sublimation colors on vinyl may appear different than on polyester fabric:
- Vinyl tends to show slightly more saturated colors
- Blues and purples may shift toward cooler tones
- Test your specific vinyl and ink combination
- Create and use ICC color profiles specific to your vinyl substrate
- Adjust design colors in your graphics software before printing
Creating Waterproof Vinyl Stickers
Sublimated adhesive vinyl creates premium waterproof stickers:
- Sublimate design onto clear permanent vinyl
- Apply clear laminate over the design (optional but extends life)
- Cut to shape with cutting machine
- Apply to water bottles, laptops, outdoor equipment
These stickers outlast printable vinyl and maintain color vibrancy for years.
Vinyl Sublimation vs. Other Methods
Understanding how vinyl sublimation compares to alternatives helps you choose the right technique.
Vinyl Sublimation vs. Direct Sublimation
Direct Sublimation:
- Only works on polyester fabrics and coated blanks
- Most affordable per-print cost
- No texture or hand feel
- Fastest production for polyester items
- Cannot work on cotton or dark fabrics
Vinyl Sublimation:
- Works on any fabric color and type
- Higher material cost per item
- Slight texture from vinyl layer
- Slower production due to multiple steps
- Unlimited color and material possibilities
Vinyl Sublimation vs. Printable HTV
Printable HTV:
- Print directly on special vinyl with regular inkjet printer
- Lower color vibrancy than sublimation
- May fade faster with washing
- No special ink required
Vinyl Sublimation:
- Requires sublimation printer and ink
- Superior color vibrancy and durability
- Completely waterproof
- Higher initial equipment investment
Vinyl Sublimation vs. DTF (Direct-to-Film)
DTF Printing:
- Works on any fabric color or type
- Requires specialized DTF printer and powder adhesive
- High equipment cost
- Excellent for production volume
- Soft hand feel
Vinyl Sublimation:
- Uses more accessible sublimation equipment
- Lower equipment investment
- Better for smaller batches or custom work
- Combines well with vinyl cutting capabilities
Cost Analysis: Is Sublimating on Vinyl Worth It?
Initial Investment
Minimum Setup ($400-600):
- Converted inkjet printer: $150-250
- Sublimation ink set: $50-80
- Basic heat press: $150-200
- Vinyl and supplies: $50
Professional Setup ($1,500-3,000):
- True sublimation printer: $500-800
- Professional heat press: $400-700
- Cutting machine: $200-400
- Bulk vinyl and materials: $200-300
Per-Item Cost Breakdown
Sublimated Vinyl Sticker (4″ x 4″):
- Vinyl: $0.15-0.30
- Sublimation paper: $0.10
- Ink: $0.15-0.25
- Total: $0.40-0.65 per sticker
Dark Shirt with Sublimated HTV (8″ x 10″ design):
- White sublimation HTV: $1.50-2.50
- Sublimation paper: $0.25
- Ink: $0.40-0.60
- Total: $2.15-3.35 per shirt (plus blank garment)
Return on Investment
For small businesses, vinyl sublimation becomes profitable quickly:
- Sublimated vinyl stickers: $3-8 retail (300-1,200% markup)
- Custom shirts: $25-40 retail (up to 1,000% markup on materials)
- Break-even typically within 50-100 items sold
Best Practices and Pro Tips
Always Mirror Your Design: This cannot be stressed enough 95% of failed projects happen because the design wasn’t flipped before printing.
Pre-Press Everything: Remove moisture and wrinkles before sublimating. This 10-second step prevents the majority of faded result complaints.
Test, Test, Test: Every vinyl brand behaves differently. Always test settings on scrap material before pressing your final project.
Invest in Quality Vinyl: Cheap vinyl saves pennies but costs dollars in failed projects. Stick with known brands for consistent results.
Cool Completely: Patience during cooling prevents paper sticking and ensures complete ink transfer. Wait the full 2-3 minutes.
Use Protective Sheets: Always place parchment paper above and below your project to protect both your press and your design.
Maintain Your Printer: Clean print heads regularly, use your sublimation printer at least once weekly, and perform nozzle checks before important projects.
Document Your Settings: Keep a notebook of successful temperature, time, and pressure combinations for each vinyl type you use.
Store Vinyl Properly: Keep vinyl rolls in a cool, dry place away from direct sunlight to maintain heat tolerance properties.
Watch Brand-Specific Instructions: Always check manufacturer guidelines for specific vinyl products—they know their material best.
Frequently Asked Questions
Can you sublimate on regular craft vinyl?
No, standard craft vinyl (like most colored permanent vinyl) cannot withstand sublimation temperatures and will melt or distort. You must use clear or white permanent vinyl specifically tested for high heat, or specialized sublimation HTV designed for sublimation applications.
What temperature do you sublimate vinyl at?
For adhesive vinyl, use 350-365°F for 25-30 seconds. For sublimation HTV, use 320-350°F for 30-45 seconds. When applying sublimated HTV to fabric, reduce to 300-320°F for 10-15 seconds. Always verify with your specific vinyl manufacturer’s recommendations.
Do you have to mirror your design when sublimating on vinyl?
Yes, you absolutely must mirror (flip horizontally) your design before printing. Since you press the print face-down onto vinyl, failing to mirror results in backwards text and images. This is the most common mistake in vinyl sublimation.
Can you use an iron instead of a heat press for vinyl sublimation?
While possible in emergencies, an iron produces inconsistent results. Irons don’t provide even pressure or accurate temperature control, leading to faded colors, incomplete transfers, and potential vinyl damage. Invest in at least a basic heat press for consistent results.
How long does sublimated vinyl last?
When properly applied, sublimated vinyl is exceptionally durable. On fabrics, expect 50+ wash cycles with colors remaining vibrant. For stickers and decals, sublimated vinyl maintains color and adhesion for 3-5 years outdoors and indefinitely indoors when protected from extreme conditions.
Can you sublimate on black vinyl?
No, sublimation ink is translucent and won’t show on black or dark-colored vinyl. You must use white or clear vinyl as a base. For dark fabrics, apply white sublimation HTV with your design, then adhere it to the dark material the white HTV provides the necessary background.
What’s the difference between sublimation vinyl and printable vinyl?
Sublimation vinyl uses heat to convert sublimation ink into gas that bonds at a molecular level, creating waterproof, ultra-durable prints. Printable vinyl uses regular inkjet ink printed on vinyl’s surface, which is less durable, may fade faster, and isn’t waterproof without lamination. Sublimation requires special equipment but produces superior results.
Can you layer sublimated vinyl with regular HTV?
Yes, you can combine sublimated vinyl with regular heat transfer vinyl for creative multi-layer effects. Apply heavier layers first (like regular HTV), then add sublimated clear HTV on top. Use lower temperature (300-310°F) and shorter time (8-10 seconds) for subsequent layers to avoid reheating previous layers excessively.
Why is my sublimation on vinyl fading after washing?
Common causes include insufficient temperature during transfer, moisture in the substrate during pressing, low-quality sublimation ink, or using non-permanent vinyl. Ensure you’re using permanent adhesive vinyl or proper sublimation HTV, pre-press to remove moisture, and verify correct temperature settings for your vinyl type.
Can you sublimate on Cricut vinyl?
Cricut Premium Vinyl (clear or white permanent) can work for sublimation if you stay within temperature limits (test at 350°F). However, Cricut doesn’t manufacture sublimation-specific vinyl, so results vary. For more reliable results, use vinyl specifically designed for sublimation like Siser EasySubli or HTVRONT Sublimation HTV.
Do you remove the carrier sheet before sublimating on HTV?
It depends on your method. When sublimating ONTO HTV before applying to fabric, YES peel the HTV from its carrier and sublimate on the exposed vinyl side (adhesive side up). When applying already-sublimated HTV to fabric, NO keep the carrier sheet on until after pressing, then peel it away.
Can you sublimate on vinyl for outdoor use?
Yes, sublimated permanent vinyl is excellent for outdoor applications. The sublimation process creates a chemical bond that’s waterproof, UV-resistant, and weather-resistant. Properly sublimated vinyl stickers, decals, and signs maintain color vibrancy for 3-5 years outdoors. For maximum longevity, apply clear laminate over outdoor vinyl applications.
Conclusion: Mastering Vinyl Sublimation
Sublimating on vinyl expands your creative possibilities beyond traditional sublimation limitations. While it requires learning specific techniques and investing in proper materials, the ability to create vibrant, durable designs on any fabric color or surface makes vinyl sublimation an invaluable skill.
The key to success lies in understanding that vinyl sublimation is actually two processes first sublimating your design onto the vinyl, then applying that sublimated vinyl to your final project. Each step requires appropriate temperature, time, and pressure settings.
Start with clear adhesive vinyl for stickers and decals it’s the most forgiving and delivers immediate satisfaction. As you gain confidence, progress to white sublimation HTV for dark fabrics, then experiment with specialty vinyls and multi-layer techniques.
Remember to mirror every design, pre-press to remove moisture, test settings before final projects, and allow complete cooling time. These fundamental practices prevent 90% of common problems and ensure professional results.
With the detailed guidance in this article, you’re now equipped to successfully sublimate on vinyl and create stunning custom designs that weren’t possible with sublimation alone. Start practicing, document what works with your specific materials, and enjoy the expanded creative freedom that vinyl sublimation provides.
Happy sublimating!

Fredrik Miller is the Founder of PrinterLake.com, a platform dedicated to providing information on sublimation printing. With a Master’s degree in Information Technology from Reputed University, Fredrik brings a wealth of technical knowledge and expertise to the site.
He leads a team of writers who are experts in the field and strive to deliver the best and most comprehensive information on sublimation printers, inks, and paper.